Labbing Virtualization Part 3 – El Ultimo Punto.

Hello there and welcome back! Well, here we are… Post numero tres about virtualization with regards to passing through a USB device into our lab environment. Hopefully you have read the first two articles; Part 1 and Part 2. If not you probably should just take a peek at them, just to be on the same page with my terminology and setup. Don’t worry, I’ll wait right here…
So, now that we are all on the same page, let’s dig into this whole “plugging in” option of physical equipment into a Virtual Machine inside of EVE-NG / PNET… But, why do this in the first place? Well, maybe you want to pass through an Ethernet USB dongle to virtual switch port on a virtual switch node in your lab. Or, perhaps you’d like to start actually labbing wireless from within a your virtual lab? Or maybe we can even push the whole virtual platform a little further and emulate some other security tasks? What’s that you say? A Virtual ISE Server for physical IP Phone with physical PC Authentications behind it? That may need to be a separate post for us…

So, let’s get this show on the road here. I can’t believe I started this series of posts 4 years ago. Jeesh… Also, I switched to PNET from EVE-NG but this process is identical between the two platforms in my experience… Another quick sidenote, when passing USB3 through to your Node in the hypervisor (EVE or PNET), make sure the guest OS can understand it. Basically windows 7 doesn’t have native support for USB3.x so, I built out a Windows 10 VM to show everyone this b/c I didn’t feel like injecting drivers and hoping…
So per our last post (Labbing Virtualization Part 2), we now see the Ralink Adapter within PNET/EVE-NG’s “lsusb” list:

So let’s pass this thing through to the Windows 10 machine… So I have a Windows 10 (build 1607) in the lab that I will be working with.
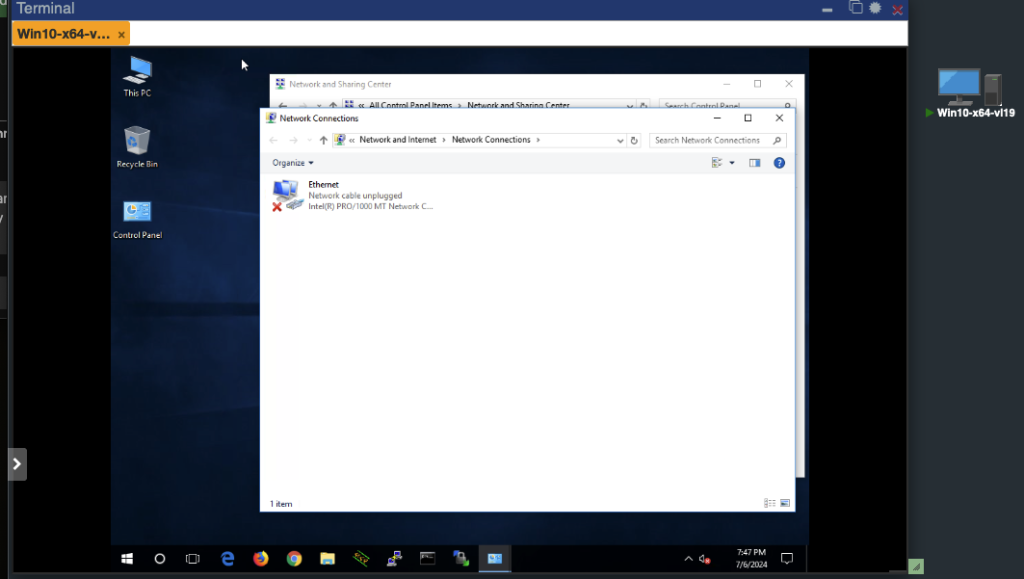
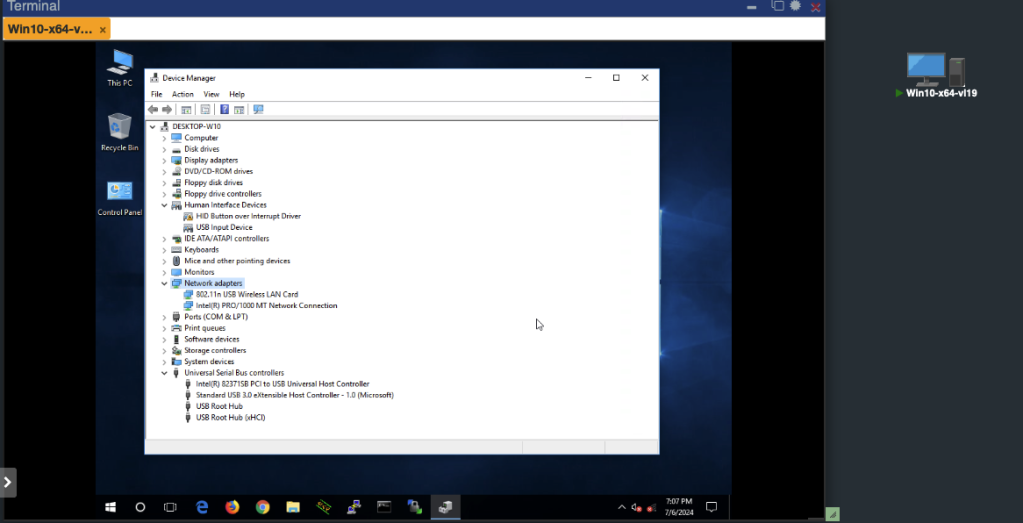
As shown above, we only have the default “Wired” Ethernet NIC that is available when installing windows normally with an ethernet adapter. Let’s hop over to Device Manager also…
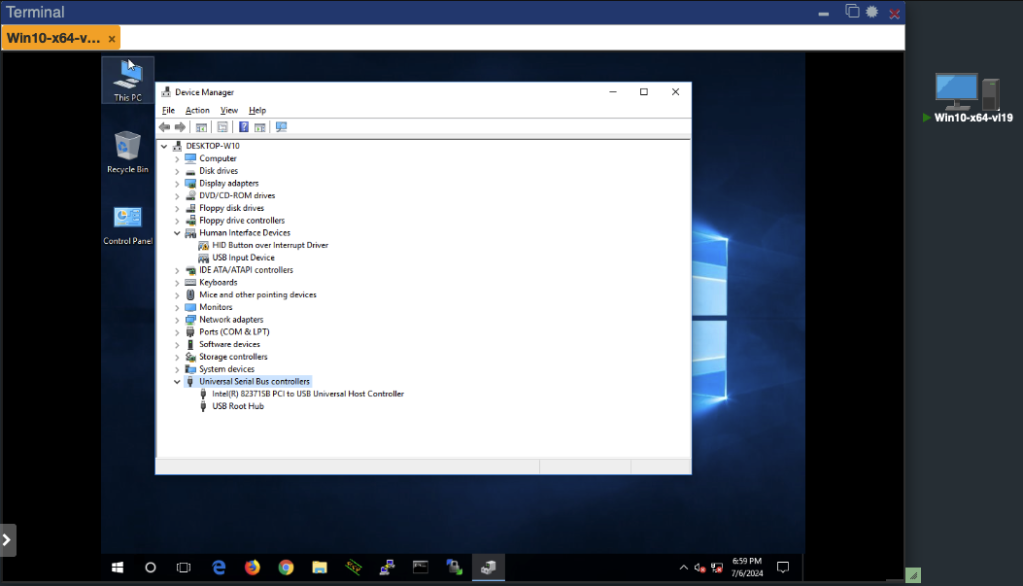
Also, we don’t see a USB 3.x controller that PNET sees at this point. Let’s change that.
First, let’s shut it (the Win10 Machine) down and grab a backup of the QEMU Options. Right click on the node on, in your lab, and click Edit. Then copy the entire value (using Command or Control A) to a text editor.
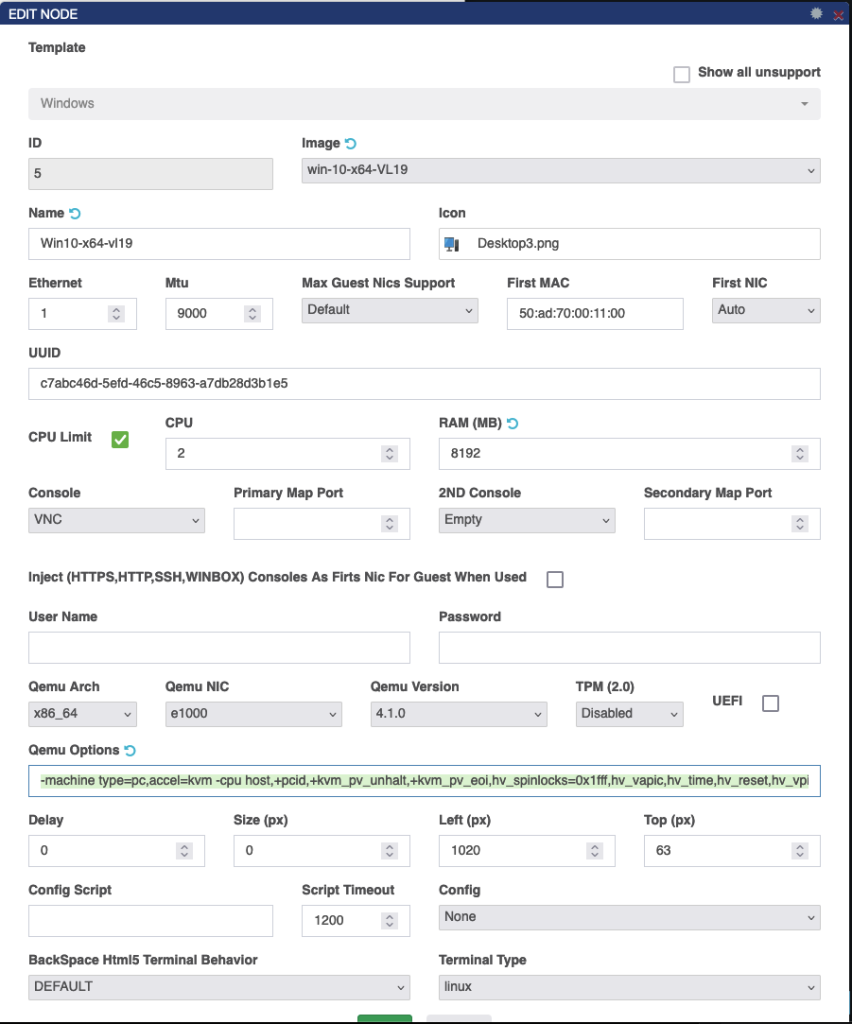
My Win10 box has the following string listed under QEMU Options: -machine type=pc,accel=kvm -cpu host,+pcid,+kvm_pv_unhalt,+kvm_pv_eoi,hv_spinlocks=0x1fff,hv_vapic,hv_time,hv_reset,hv_vpindex,hv_runtime,hv_relaxed,hv_synic,hv_stimer -vga qxl -device qemu-xhci -usbdevice tablet -boot order=cd -drive file=/opt/qemu/share/qemu/virtio-win-drivers.img,index=1,if=floppy,readonly
For starters, let’s being with letting Windows know we have a USB3.0 hub available to it. Modifying our original QEMU Options string above, with one additional option should do the trick. Basically “I want to use PNETs USB3.0 bus”; which in QEMU Option speak is “-device qemu-xhci”
So our new string is (note the blue): -machine type=pc,accel=kvm -cpu host,+pcid,+kvm_pv_unhalt,+kvm_pv_eoi,hv_spinlocks=0x1fff,hv_vapic,hv_time,hv_reset,hv_vpindex,hv_runtime,hv_relaxed,hv_synic,hv_stimer -vga qxl -device qemu-xhci -usbdevice tablet -boot order=cd -drive file=/opt/qemu/share/qemu/virtio-win-drivers.img,index=1,if=floppy,readonly
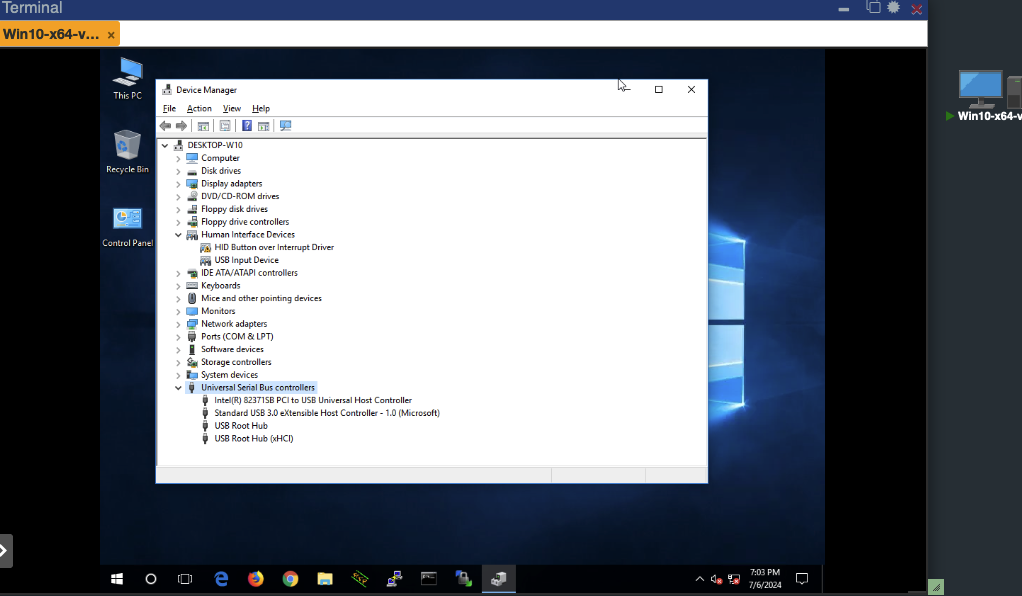
Let’s paste that back into the Win10 Node, save the node in the lab, and then boot it up… Did anything change? Let’s check Device Manager again; and BOOM. There’s the USB 3.0 controller, from PNET, from VMWare, from the Dell Host. That’s not too exhausting right?
So let’s shut the Win10 machine down again, and then modify that QEMU Options string one more time; adding the RAlink device (Bus 1 Device 5) from above. Again, copy out that QEMU string and let’s add the RAlink USB device. Or as they say in QEMU “-device usb-host,hostbus=1,hostaddr=5“. (note, based off PNET/EVE-NGs lsusb output, you will have to match the hostbus and hostaddr values)
My “fully updated” QEMU Options string now has the USB3.0 Controller as well as the RAlink USB Device: -machine type=pc,accel=kvm -cpu host,+pcid,+kvm_pv_unhalt,+kvm_pv_eoi,hv_spinlocks=0x1fff,hv_vapic,hv_time,hv_reset,hv_vpindex,hv_runtime,hv_relaxed,hv_synic,hv_stimer -vga qxl -device qemu-xhci -device usb-host,hostbus=1,hostaddr=5 -usbdevice tablet -boot order=cd -drive file=/opt/qemu/share/qemu/virtio-win-drivers.img,index=1,if=floppy,readonly
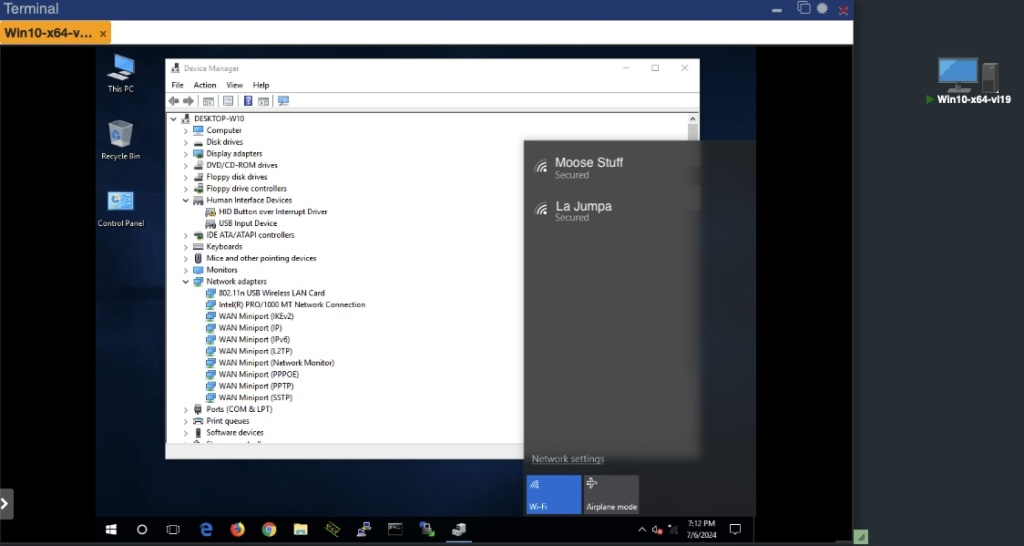
Again, let’s paste that “fully updated” string back into the Win10 Node, save it in the lab, and then boot it up… Did anything change, again? Let’s check Device Manager; and there’s our RAlink WiFi network device (the devaaaace).
Just for kicks, let’s go back to Control Panel and Network Connections to see if anything has changed…

“Ohhh SNAP Mr. Lewis…. ohhhh snap!” (Kee and Peele reference)… Now we see a Wireless adapter. What is this trickery you see with your eyes? Let’s see if there’s actual WiFi in the Area…
And there is… Actual wireless on a Windows machine from within PNET, within VMWare as the original hypervisor, passing through a USB device from the Dell host.
Hopefully this post helps with your labbing and a little more of your understanding. I’ll be using this setup going forward to build on for other labbing topics such as WiFi and Security. Catch you soon.
Stark out.